Monthly Archives: December 2011
DIY Christmas Ornament 17: Bells
Finally a bells ornament, right? No? Ok…well you get one anyway.
I’ve always had a fascination for bells around Christmas time. I think it’s the sound of bells that ignites the Christmas Spirit so it’s a shame it took me this long to come up with something for the bells.
Warning: I didn’t have a tripod while taking these pictures and the low light recorded every shake. I apologize that they are more than a bit blurry.
Step 1:
Collect your supplies.
- 8 medium sized bells
- 1 thin, sturdy twig
- Ribbon or holiday bow
- Hot Glue/Gun
- Scissors
Step 2:
Thread the bells onto the twig, leaving some of the twig exposed at the bottom.
Step 3:
Using hot glue to secure the bottom bell to the twig.
Cut off the excess twig at the bottom.
Step 4:
Choose a holiday bow in which to top your bell ornament.
Wrap the adhesive strip from the bow around the twig at the top of the ornament. You may need to cut the adhesive to make it fit.
(sorry so blurry) Must. Find. Tripod. Now.
Step 5:
Using scissors, trim the ribbon to show the ornament or wrap the pieces around the bells.
Attach another piece of ribbon on the top of the ornament as a hanger. I used a small piece of white ribbon and secured it with hot glue.
Project Cost Breakdown (per Ornament):
Holiday Bells (Already Owned – Originally purchased from Michaels for another project) = $0
Twig (Found Object) = $0
Holiday Ribbon (Already Owned) = $0
Hot Glue/Gun (Already Owned) = $0
Total Project Cost: $0
In Progress: Fireplace Re-Design
The minute I moved into this house, I wanted to redo the fireplace. It took me the last 18 months to work up the nerve to start such an intensive redo on my own. However, last month I started chipping away at the tile.
The first 3 tiles came down easily and gave me an idea of what I was dealing with. Apparently I was dealing with a heavy dose of grout and A LOT of construction adhesive.
Within about 20 minutes I had the top row down completely.
Over the next few weeks I slowly chipped away at the tile. I was only able to work on it after work and had to be done before 8pm in order to be considerate to my neighbors. The fireplace is on a shared wall in the condo and the tile removal was loud at times.
A majority of the tiles came down easily, but there were some that just wouldn’t budge. Once I finally pried them loose, they tore off chunks of drywall.
The worst damage was on the bottom, and I cause quite a bit of this since I had trouble getting any kind of leverage on the tiles.
This was my first venture into drywall repair so I called on my dad to come over and help. A few weeks back we spent 8 full hours repairing drywall and installing the mantle.
I was amazing at how easy it was to patch the sections of drywall. I had been concerned that I would have to rip out and replace large sections of wall. Instead we were able to use some joint compound to fill the sections and after allowing it time to dry, we had a great surface to move forward with the installation.
At Lowe’s I picked up a premade Mantle (on sale) and a premade Pilaster kit. Typically you would also install a surround behind the Pilaster kit, but I needed the lowest profile possible and the surround just didn’t work for me.
Both the mantle and pilaster kit were easy to install. The hardest part was keeping everything level. This house is…well…a little off balance, and keeping things level can be a challenge. However, we were able to get everything up after few hours work.
In addition to the mantle and pilaster kits, I picked up two pieces of white primed boards to fill the space above the pilasters and below the mantle. Since taking this picture a piece of moulding has been added on top of these simple white boards and it was the perfect addition.
So here’s where we finished after the one day of work. We got much further than I ever expected and I’m thrilled with the progress. I’ve also continued with the progress and will share more in another post. However, since these pictures were taken we’ve done another coat of compound, I’ve filled all holes, sanded and primed the entire piece.
Next Steps:
- Paint with White Semi Gloss (2+ Coats)
- Install Tiles, Grout, etc
A quick look back…
I can see the end in sight, and even though it’s not done, I can still hang my Christmas stockings this year which makes me the happiest person around.
DIY Christmas Ornament 16: Marbling
I know I’ve said it before, but this one is just too cool. With all the great holiday colors out there, the possibilities are endless. My only suggestion is to NOT use anything paint with glitter. The glitter will eventually drift to the bottom and the end result won’t look as great as you think it will. Trust me on this. Those paints also tend to be thicker which will be much harder to work with.
For this project, use a basic, inexpensive crafty paint. You could also use leftover interior paint if you have some on hand.
Step 1:
Collect your supplies.
- Clear Ornament
- Craft Paint
- Toilet Paper Tube
Use the tube anytime you need to balance the ornament (especially important when you are taking pictures).
Remove ornament cap.
Step 2:
Start by dripping a drop of one color into the ornament and let it drip down the side.
Continue doing this with any additional colors you have.
As the paint drips down the edge you want to swirl it so there are no clear parts of the ornament left. Once half the ornament is done squeeze a few drops of each color into the bottom of the ornament then swirl them around to cover the rest of the ornament.
Step 3:
Once all clear spots are covered tip the ornament upside down on the toilet paper to let any excess paint drain. Make sure to put a few paper towels under the toilet paper roll to catch the paint.
Step 4:
Replace the ornament cap and enjoy!
This would also be a great craft to give new life to any old clear ornaments that you have. Even if they have color or designs on them, the marbling could look really awesome.
Project Cost Breakdown (per Ornament):
Clear Ornament (Already Owned) = $0
Craft Paint (Already Owned) = $0
Toilet Paper Roll/Paper Towel (Already Owned) = $0
Total Project Cost: $0
DIY Christmas Ornament 15: Paper Art
I’ll be honest, this ornament is going to be difficult to explain. It’s a play off some paper quilling art I used to do in junior high and while it isn’t hard, it is a little time intensive…and that doesn’t include the time I had to take after nearly slicing my finger off with an X-acto blade.
This is also a huge ornament that would probably work better sitting on a mantle or as wall art. Of course, you could make it smaller simply by using shorter strips, but after cutting my finger, I didn’t want to start over. Actually the original plan was to make a full flower, but the end piece was so big that I stopped it halfway, and I think it worked out pretty well.
Also, please bear with any typos. The bandage on my hand keeps hitting the ‘y’ key.
Step 1:
Collect your supplies.
- 2 pieces of computer paper
- X-acto blade
- Ruler
- Tacky Glue or White Glue
- Spray Adhesive/Glitter (optional)
Step 2:
Using the X-acto blade and ruler, cut the computer paper into 1/2 inch thick strips.
Step 3:
Then cut a 3 of those pieces in half.
Put a dab of tacky glue at one end and roll, securing with another dab of glue at the other end.
You will need one of these for each petal of your flower. If you choose to do more or less petals than mine, keep this in mind. Also, you can use white glue (such as Elmer’s) but it takes a bit longer to dry and the tacky will shave quite a bit of time off the project and you shouldn’t need to clamp anything for drying.
Step 4:
Take 3 strips of full length paper (not the ones you cut in half) and fold them in half.
Line them in a way you like, and then glue the sides toether.
Add the the circle you created earlier, and figure out your spacing.
Apple a little glue to the circle and then squeeze the sides in, attached the circle to the sides.
At this point it should look like this.
Cut off the excess and add any glue if any of your pieces come loose.
Make 5 of these petals.
Step 5:
Using Tacky Glue, attach all the petals together at the base as well as in between each petal.
Tip: If your flower is a little flimsy on the bottom, use a few of the remaining strips. Fold them in half and glue them along the bottom of the flower. You won’t see them, but they’ll keep the base of the flower sturdy.
Step 6:
Optional: spray with adhesive and sprinkle with glitter.
Step 7:
Add a bit of ribbon to the top and hang from the tree.
Project Cost Breakdown (per Ornament):
Computer Paper (Already Owned) = $0 [You could also use vintage pages from books, sheet music would look pretty cool too]
Tacky Glue (Already Owned) = $0
Spray Adhesive/Glitter (Already Owned) = $0
Ruler/X-Acto Blade (…bandages) (Already Owned) = $0
Total Project Cost: $0
DIY Christmas Ornament 14: Raised Words
Whoa,where did the day go? Even though today was incredibly busy, it was also completely productive. I feel like I knocked out most of my to do list for this week and it feels so good.
The best news of all…my Christmas shopping is DONE!
I even finished up the ornament for today; although, I’m barely getting it posted in time.
Step 1:
Collect your supplies.
- Clear Ornament
- Puffy Paint
- White Spray Paint
- Twine/Ribbon
Step 2:
Using the puffy paint, write a holiday message on the ornament. I learned pretty quick that I’m not great at writing with puffy paint so I chose a short word.
Tip: You can also use hot glue to do this step if you don’t have puffy paint. Make sure to clean off any glue strings before you spray the ornament. Also BONUS, with hot glue, it will dry much faster and you’ll be able to spray paint much sooner.
Step 3:
After the puffy paint has dried, I sprayed the entire ornament with some satin white spray paint that I had on hand. Since my garage has terrible lighting, I don’t have any pictures. However, it made quick work of the ornament and after letting it dry overnight, I was pleased with how it turned out.
Step 4:
Add a little twine and ribbon for a fun.
Project Cost Breakdown (per Ornament):
Clear Ornament (Already Owned) = $0
Puffy Paint (Michaels) = $2
Satin White Spray Paint (Already Owned) = $0
Twine/Ribbon (Already Owned) = $0
Total Project Cost: $2
2011 Gift Guide – For The Home
As much as I loved the Ladies Holiday list, I love this list more. I am a sucker for home decor and any of these would be welcomed with open arms under my tree. I’m off to finish my holiday shopping with my mom today, so I’ll be back later to share today’s ornament.
Custom Return Address Stamp
Cost: $59
I actually wouldn’t limit this gift to Holidays. This would make a great housewarming gift or wedding gift. It’s unique, handmade, and completely beautiful.
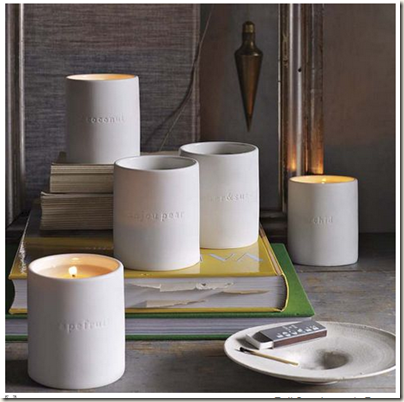
Nest Core Homescent | west elm
Cost: $19.95
Clean, lovely candles are a wonderful gift for anytime of year. I really like these because the packaging is so simple and beautiful. They would go with anyone’s decor and the scents sound great (like Lime Basil, Almond Coconut, or Wild Orchid). The container would also make a great vase once the candle is gone.
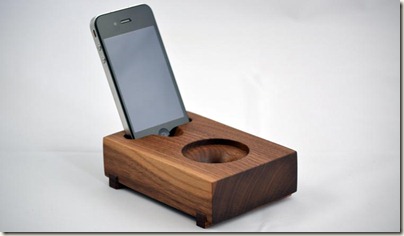
Koostik Mini Koo iPhone Speaker
Cost: $70
The greatest ‘green’ speaker ever created (in my opinion). This ipod/iphone speaker has no cables and requires no electricity making it great for anywhere at anytime.
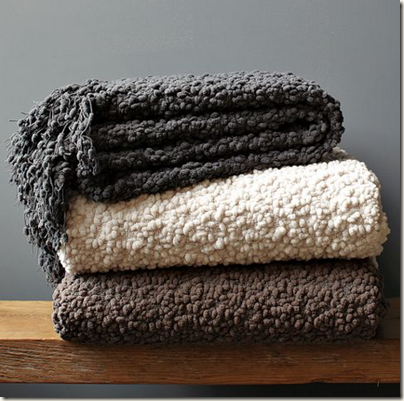
Cozy Throw | west elm
Cost: $49-69
The temperatures have finally dropped and all I want to do is wrap up in a cozy throw in front of the fire.
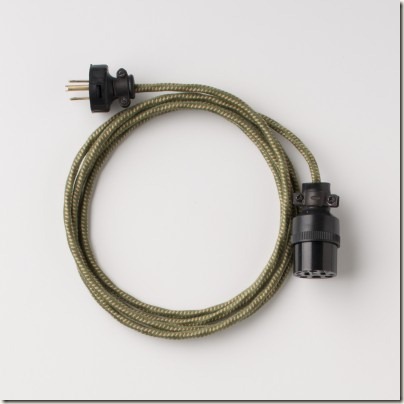
Schoolhouse Extension Cord
Cost: $39
I currently have a really ugly orange extension cord running across my office as I close out the ornament challenge. It looks awful and makes me cringe. However, this lovely fabric covered extension cord would look great in any room, even when it’s left out in the open.
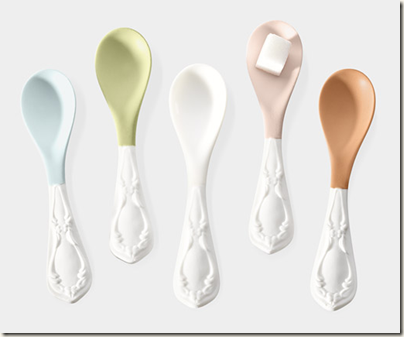
Miix Spoon Set
Cost: $28
Unique, Pretty, and I want them so much.
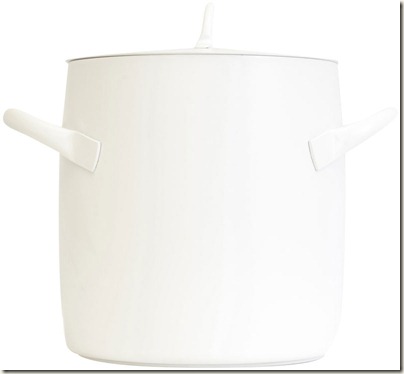
zani & zani pentola stock pot – matte white
Cost: $120-$550
I almost didn’t put this on here since I could never afford it. In fact, if I read the website right, the lid alone is $120…WHAT? However, I do love the idea of a white stock pot and it could serve for inspiration. I’ll keep looking for a cheaper style. (Don’t ask me why they would photograph a white pot on a white background…makes no sense).
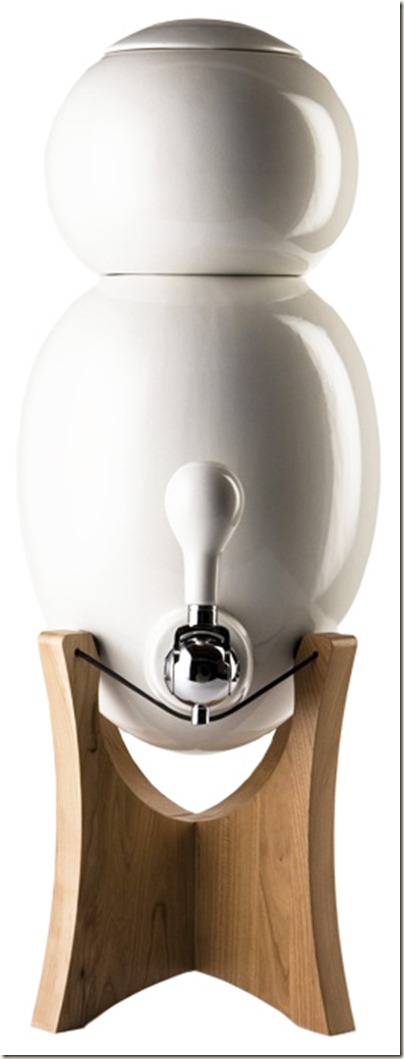
ovopur water filter
Cost: $699
Ok, yes I know, another ridiculously expensive item that I would probably never be able to afford. However, I’ve never seen water filter quite this lovely, and if you’ve won the lottery recently, it might be great for you.
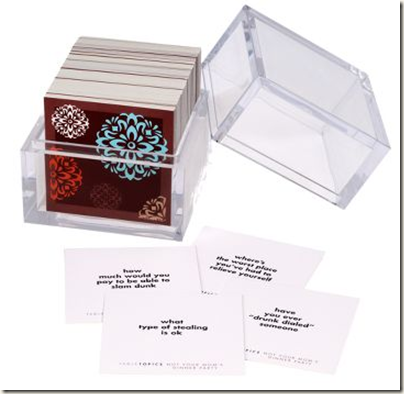
Party Games – Not Your Mom’s Table Topics
Cost: $13.95
I don’t have a lot of games in my house, but I’m addicted to these Tabletopics. They are great for company anytime and can start some very interesting conversations.
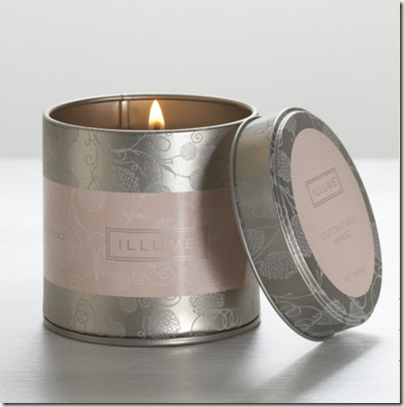
Coconut Milk Mango Soy Tin
Cost: $17.50
I found a similar candle at Anthropologie last year that had such a great tropical scent. This is the closest I could find to that candle, in fact it may even be the same company that created them for Anthropologie. I gave the candle away as gifts to a few people, everyone loved them. (that or they flat out lied to me…)
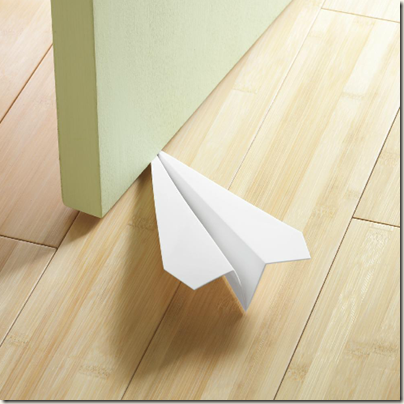
airplane doorstop
Cost: $38
Do I even need to say anything about this? Greatest doorstop…EVER!
ripple porcelain trays – white
Cost: $30
I’m hosting Christmas dinner at my house this year and I would love to have these on hand. The simple style but unusual edge make them a great ‘wow’ piece.
DIY Christmas Ornament 13: Felt Tree
While this ornament is a little more time intensive than other ornaments I’ve done, it really is quite easy and BONUS…It turns out the cutest little felt tree I’ve ever seen. I also had an adorable little helper when it was time to take pictures of the finished tree, I’ll introduce you below.
Step 1:
Collect your supplies.
- Felt (1 sheet for each color you want. I used 1 sheet of olive green and 1 sheet of cream)
- 1 Cork
- Thread (I used the crochet thread that I had purchased for thisornament) & large Needle
- 4 Fake Berries or Large Beads
- Tacky Glue & Hot Glue/Gun
- Basic Wire Ornament Hanger
- Scissors
Step 2:
My tree had 4 levels so you’ll need to choose which color will be the bottom level of your tree and cut 3 circles of felt that are the same size. I used a canning lid to make this first layer. These should be the larges of the 4 circles.
Step 3:
Choose the color felt you want to use for the next level and cut 3 circles of that color, slightly smaller than the previous circles.
Tip: I’m sure I’m not alone in cutting shaky circle out of felt. To help me keep the circles consistent I found things around my house to help make the circles. For the 3rd level, I used a TP roll pressed onto an ink pad to create the circle on the felt. Then it was just as easy as cutting along the line. Although if you do this, be light handed with the ink as you don’t want it to show after you cut the circles.
Keep going with the additional levels of your tree.
When you’re done, you will have 4 levels of felt that will create your tree. Each level should be made up of 3 felt circles, giving you a total of 12 circles.
Step 4:
Using tacky glue, glue the 3 layers of felt together for each level. This step is to make sure that each layer of the tree is study enough to actually look like a tree in the end. Depending on how thick your felt is, you may need more or less than 3 layers. I used basic felt sheets purchased from Michael’s and 3 layers worked perfectly.
Now, instead of having 12 pieces of felt, you should have 4 thick pieces of felt.
Step 5: (I really hope this makes sense)
Thread a large needle with the string or crochet thread and make a knot at one end of the thread. You are going to thread each layer of felt onto the thread, separating each level with a bead or fake berry.
Starting with the bottom layer, push the needle up through the bottom level of tree.
I used fake foam berries that I pulled of a plant I had in the house, but you could use big beads as well.
Thread the needle through the berry.
Start making your tree by alternating felt with berry…
…until you have a complete Christmas tree.
At the top of the tree, make a small loop out of the thread and tie a knot, cut off the excess. You can then use a basic wire ornament hanger to hang the ornament.
Tip: Use some homemade mod podge and glitter to give the top berry a little sparkle.
Step 6:
Cut a cork down using a straight edge blade. Using hot glue, apply it to the bottom of the tree.
I think this ranks as the cutest ornament so far, I absolutely love it.
Behind the scenes: My hands always shake when I’m trying to hold the DSLR with only one hand and the ornament in the other for pictures. So I had to enlist a little help in holding the ornament during the photoshoot.
Meet my little balloon dog…He did a great job.
Project Cost Breakdown (per ornament):
- Felt (1 sheet for each color you want) (Already Owned) = $0
- 1 Cork (Already Owned) = $0
- Thread (I used the crochet thread that I had purchased for thisornament) & large Needle (Already Owned) = $0
- 4 Fake Berries or Large Beads (Already Owned) = $0
- Tacky Glue & Hot Glue/Gun (Already Owned) = $0
- Basic Wire Ornament Hanger (Already Owned) = $0
- Scissors (Already Owned) = $0
Total Project Cost: $0 FREE!
The balloon dog is heavy light pink glass and looks like a balloon dog in every way, he’s adorable. I picked him up for cheap at Homegoods a while back, but I believe you can still find it at retail stores online.
Linking To: Funky Junk Interiors
DIY Christmas Ornament 12: Sequins and Lace
What could possibly be more girly than sequins and lace? Not much, but this ornament is more than just girly…dare I say sexy? This one was inspired by a friend who asked me what to do with all those sequins after completing this ornament. It’s true you’ll have a lot leftover and I wasn’t sure what to do with them either.
So one recommendation is to use them in another ornament.
Yes, I think this is a SEXY ornament.
Step 1:
Collect your supplies.
- Sequins (any color)
- Clear Ornament
- Lace
- Spray Adhesive
- Piece of paper (to make funnel) or use an actual funnel
Step 2:
Remove ornament cap. Create paper funnel by rolling the piece of paper and securing with a piece of tape.
Using the funnel, fill the ornament with the sequins.
Tip: Use a bottle cap or rubber band to keep the ornament stable while you deal with the sequins.
Step 3:
Replace ornament cap. Cut a piece of lace large enough to wrap around the ornament, overlapping slightly.
Step 4:
Spray one side of the lace with spray adhesive and carefully wrap it around the ornament. Press down all the edges so everything is securely attached to the ornament.
That’s it, easy right?
Tip: Usually I would advise to use whatever glue you have on hand to keep costs down, but in this case, spray adhesive is your best option. Mod podge and tacky glue will work but will show on the ornament. The same with hot glue. If you use spray adhesive the lace will hold well and won’t show any unnecessary residue on the ornament.
Project Cost Breakdown (per ornament):
- Sequins (Already owned from this project) = $0
- Clear Ornament (Already Owned) = $0
- Lace (Already Owned) = $0
- Spray Adhesive (Already Owned) = $0
Total Project Cost: $0
DIY for the Peacock ornament in the background is found here
Linking To: Funky Junk Interiors
2011 Holiday Gift Guide – For The Ladies
I have been scouring the web for some of my favorite gift ideas over the past few weeks and I’m beyond excited to share a few of my suggestions for the ladies in your life. This being my first year doing this on a blog, and it’s a very random mix of stuff. Next year I’d like to break it down into some different categories and price ranges.
I know I would be thrilled to receive any of the below, which leads me to think that there may be a lady in your life that would appreciate them too.
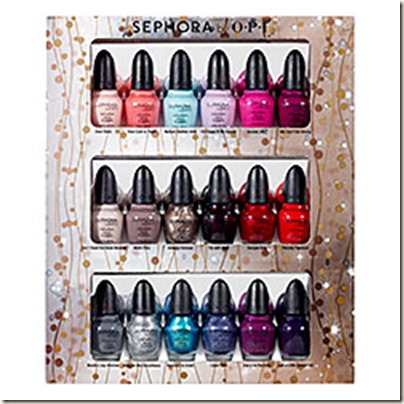
SEPHORA by OPI Glimmer Wonderland Eighteen Piece Mini Nail Colour Set ($81 Value): Nail Polish Sets
Cost: $48
A beautiful collection of nail polishes that could last you all year long. I have used Sephora by OPI in the past and it’s a great formula. While I haven’t used this set, many of their colors are good in one coat. No watered down polishes here.
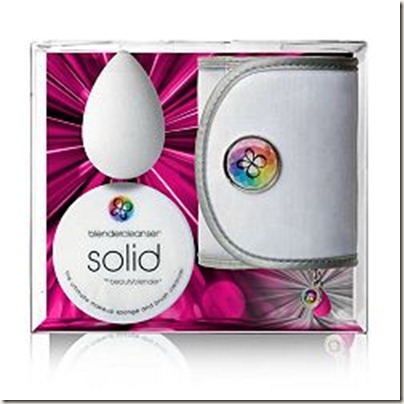
Beautyblender Pure Kit
Cost: $49.95
I own a version of this Beautyblender sponge and it’s amazing. It is high quality and the unique shape gets into all the various curves of the face. I really like this set because it comes with a carrying case and sponge cleanser.
Nagauta Kabuki Brush Set – NARS
Cost: $225
True, it’s a very expensive brush kit; however, if you take care of these they’ll last you for a very long time. Personally I think every woman should have a few high quality makeup brushes in their kit and these are not only functional, but absolutely beautiful.
Edited to add: This item is currently out of stock, but keep an eye on it in case they get more in stock.
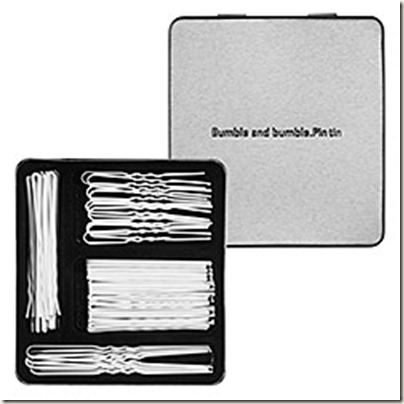
Bumble and bumble Pin Tin: Styling Accessories
Cost: $15
Can we say GENIUS? I can’t tell you how many times I have had to dig through my purse to find a bobby pin. This is the perfect kit to throw into any bag and always have a few handy. Not only would you have a bobby pin at all times, but it holds several different styles that will work with any hairstyle.
Dear Santa…I want this in my stocking!
Bluish Green and Pale Purple – Trio of Dahlia Hairpins
Cost: $13
I had a different set queued up to be posted on the here, but i loved them so much that I bought them myself. They are from an Etsy seller, so she has only one set listed. If you’re curious, I bought these and these and I’m so incredibly excited to receive them I can barely sit still. They’re stunning.
Hot Cocoa Slippers – Roxy
Cost: $34
I may live in Southern California, but it still gets incredibly cold here in the winter so slippers are required. However, I can’t stand most styles that are too furry or too hot. I don’t want my slippers to look like slippers. These are perfect since they are a simple design that looks like cute flats but it will still keeps your toes warm.
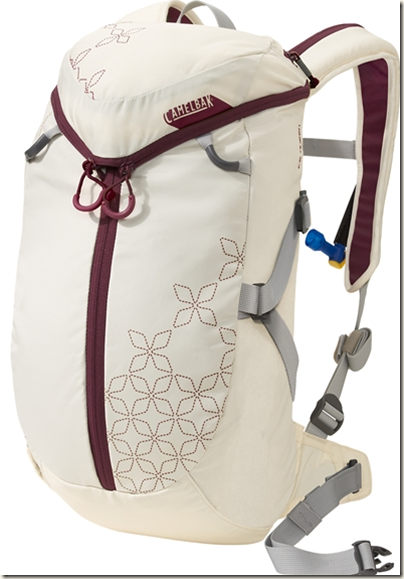
CamelBak® – 2011 Ice Queen
Cost: $79
This one is for the workout divas. This backpack will keep you stocked with water (that won’t freeze) and also has room for supplies/goodies. They also carry a smaller profile style that holds the same amount of liquid, but has reduced storage space. I would say this one is better for longer distance hikers and those that exercise in the snow. The smaller design would be great for those that only need minimal supplies; like keys, ID, Credit Cards, phone and a few other essentials.
Lululemon Athletica Reflective Key Cuff
Cost: $10
So you don’t need a CamelBak, but you still need to carry a few things. This is perfect and I would love to have this on hand even when I just take my dog out for a walk. It’s an excellent way to free up your hands and carry just the essentials.
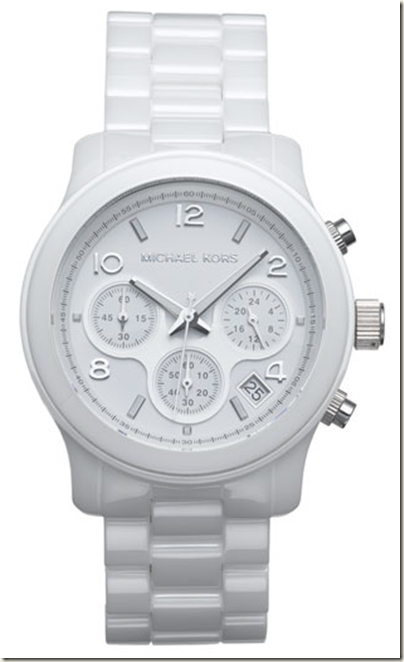
Michael Kors ‘Runway Ceramic’ Watch | Nordstrom
Cost: $450
The most expensive thing on the list, but…oh so lovely. I have a thing lately for white watches and this Ceramic watch from Michael Kors makes me swoon even if I could never afford it. This is a gift guide wish list, right?
Oakley GB Neck Warmer 2.0 | Oakley Store
Cost: $18
I actually added this one for my friends on the East Coast. It’s oh so perfect for those snowy days and it’s amazing how keeping your neck warm will keep the rest of your core warm as well.
*For the record: I have not been asked to blog about these items or compensated in any way by any of these brands (they don’t even know I exist). These are my honest suggestions for things that I like and may make a great gift for someone on your list.
What’s on your Christmas list this year?

