
If you count the time in which I’ve been dreaming about the finished fireplace, it’s been a long 18 months. The fireplace felt like a daunting task and I’m a little shocked that I actually did it (with some help, of course). 18 months of dreaming has turned into a finished fireplace that is better than I could have imagined. I’m so excited that I’ve been doing a little happy dance over here for the past 3 days. Here’s a quick look back at the journey.
A basic black and brass gas fireplace insert surrounded by beige 8 x 8 inch tiles. The tile color was actually more of an almond color and looked awful. It was in bad shape and the grout was cracking all over.We tried patching it at one point but clean grout just made the rest of it look dirtier. At some point the previous owners had tried to burn wood in the gas fireplace so there was soot all over the top which isn’t very visible in the picture.

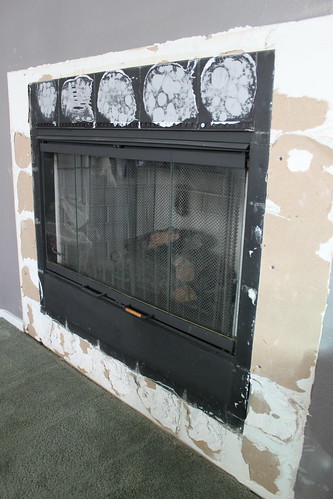
The first step was to paint the fireplace screen. I did this first because I knew if I got paint on the tiles it wouldn’t matter since I would be tearing them down. It was a good start and made a big difference to get rid of the brass. Plus it cost less than $5.

Next I started tearing the tile down. This took a few weeks since I was only able to work on it for a few hours every couple of days. I quickly found that the builders had adhered the tile with construction adhesive which made for some difficult removal, especially on the bottom row.
A little drywall repair was in order, then we began installing the prefabricated mantle and pilaster set. That solid white strip of wood under the mantle was later covered with a more decorative moulding. This was all followed with another few weeks of nail setting, filler, sanding, and priming.

At this point we celebrated Christmas and I was able to hang stockings on my ‘in progress’ mantle.

This is where I asked for your help on tile choices. After choosing the tile, this past weekend we installed it, grouted, and painted both the surrounding wall and put a few coats of white gloss on the wood.
So which tile did I choose?
Option 1 was the winner!

Isn’t it lovely?!

Why did I pick Tile Option #1?
A lot of it had to do with the price. Option 1 tiles were clearance at Home Depot. Each sheet was only $3.76 as opposed to the $11-14 per sheet for all the other styles. So instead of paying about $100 for the tile, I only paid $30. So while Option 3 was actually my favorite, it would have been very expensive and difficult to cut down.
I did have to cut some of these tiles, but with a pair of Tile Nippers purchased at Lowes, it was fairly easy. This was another positive to option 1, most of the other styles would have required more extensive cutting.

Now I have the opportunity to create pretty mantle designs. Right now I’m loving a natural winter theme. I changed out the candy corn from this project and replaced it coffee beans. The flowers are from Hobby Lobby, snowflake candle holders were from the Crate and Barrel Outlet while everything else came from Homegoods.

Price Breakdown:
Drywall Repair Supplies (Join Compound, etc) (Lowes/Already Owned) = $13
Sander/Sand Paper (Already Owned) = $0
Prefabricated Mantle (Lowes) = $84
Prefabricated Pilaster Kit (Lowes) = $64
Decorative Wood Moulding (Lowes) = $13
Nails/Wood Filler (Lowes) = $5
Kilz Primer (Already Owned) = $0
Valspar White High Gloss Paint (Already Owned) = $0
Wall Paint Touchups (Already Owned) = $0
Tile (Home Depot) = $30
Tile Adhesive (Already Owned) = $0
Grout/Supplies (Home Depot) = $15
High Heat Spray Paint for Fireplace Screen (Home Depot) = $4
Total Fireplace Remodel Cost = $228
Originally I had thought it would cost closer to $400 to finish the fireplace, but I was able to catch some great sales and the clearance tiles meant that I was able to cut the cost down under $250. Well worth it and I think it really adds to the house.
**Edited to change the cost of the Pilaster set. I origianlly thought it was $104, but after finding the receipt it was really $64. The $104 was the origianl cost of the Mantle kit, but it was on sale for $84.
…and because I still can’t believe it…
one last before…
…and after!

Linking To: Addicted 2 Decorating, Thrift Decor Chick


